Welcome to the One Stamp At a Time Blog Hop! I'm so glad to have you here at Create With Christy! This month, our theme is 'Tis the Season - Holiday Projects.
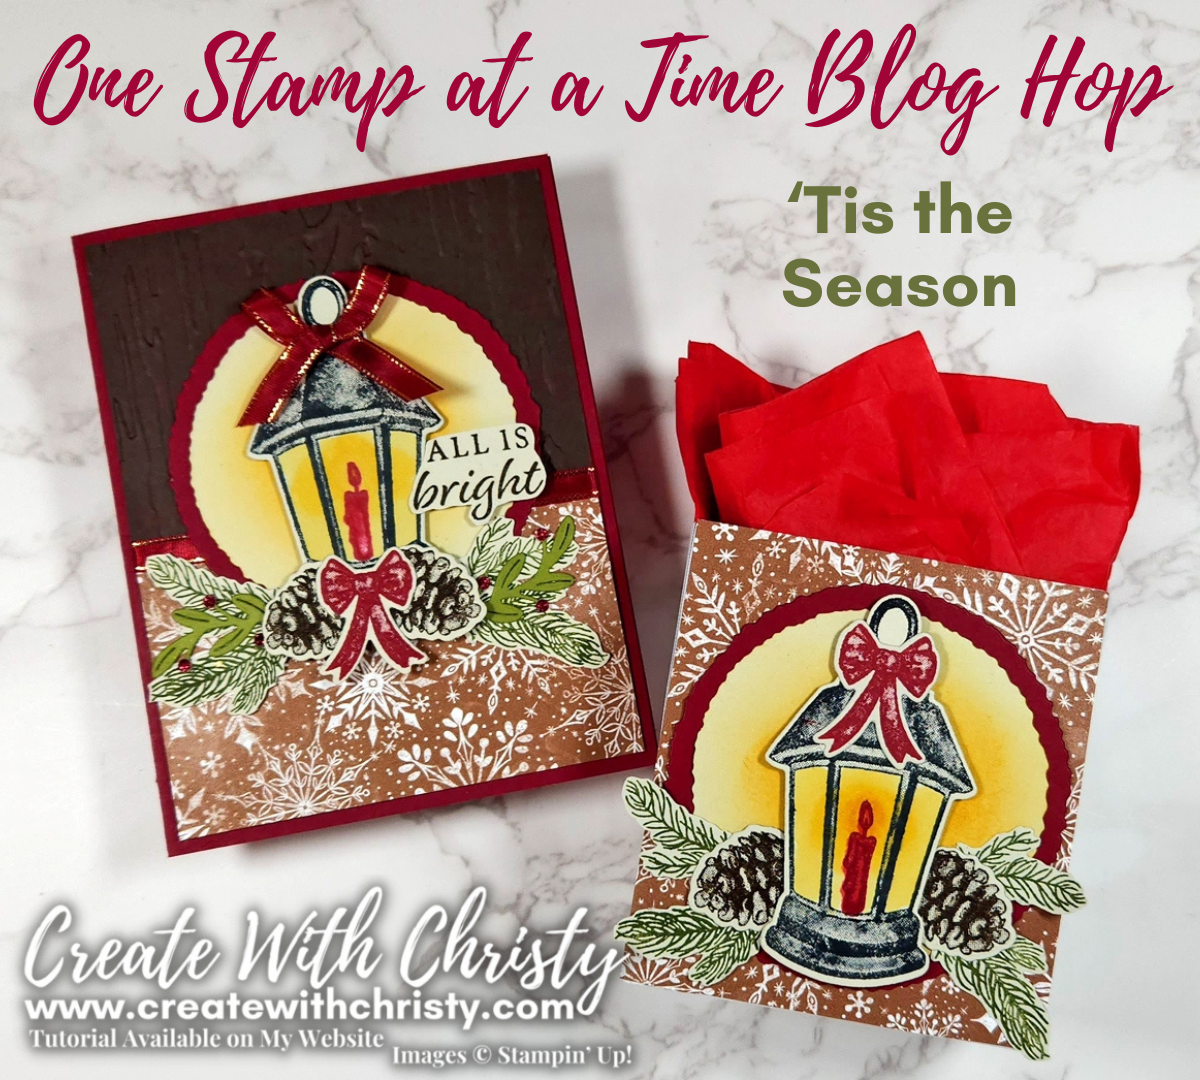
For my holiday projects, I decided to make Christmas projects. I made a Christmas card with a coordinating gift bag.
The bundle I featured on both projects is the Light the Year Bundle. It was the only Christmas bundle that I own from the September-December 2024 Mini Catalog I hadn't used yet, so I just had to use it for this blog hop. I fussy cut the sentiment from the bundle out using Paper Snips.
The Early Espresso base layer was embossed with the Birch Wood 3D Embossing Folder. I've used this embossing folder SO much, and I LOVE it!
I paired the bundle with the Sentimental Christmas Designer Series Paper (DSP). This is the same DSP I featured in my Monthly Online Card Club this month. I REALLY love this snowflake design. The snowflakes are beautiful, and the non-traditional color background, Pecan Pie, makes it extra special. I think it goes so well with the Christmas lamp I made.
I added a ribbon strip & bow using the Cherry Cobbler & Gold Satin Ribbon. That little bit of gold on the ribbon is such a perfect touch!
Here's how I made the candle glow:
- I stamped the larger lamp in the bundle using Tuxedo Black Memento ink.
- I stamped the candle inside the lamp using Cherry Cobbler ink.
- I colored the flame in with the Dark Daffodil Delight Stampin' Blend.
- I made a small, colored-in circle around the outside of the flame using the Light Daffodil Delight Stampin' Blend.
- I made a wider, colored-in circle around the first one using the Dark Lemon Lolly Stampin' Blend
- I colored the rest of the inside of the lamp with the Light Lemon Lolly Stampin' Blend.
I wanted the Basic Beige circle, made with the Deckled Circles Dies, glow like the lamp, too. I used a Blending Brush and brushed some Crushed Curry ink over most of the circle, adding more ink to the middle of the circle to make it darker.
There are two different lamp stamps in the Light the Year Stamp Set in the bundle, and I stamped the smaller one on the inside of the card. I colored the inside of the lamp the same as the front of the card. The sentiment is also from the same stamp set.
My coordinating treat bag was made with the Gift Bags Combo Pack. These gift bags can be found in the Online Exclusives section of the online store, and the pack comes with two different sizes of bags. I used the smaller bag in the pack for my gift bag.
I pretty much decorated the outside of the bag with the same elements I used on the card. I did change it a little big, but not much. The DSP piece was just tad too long from top to bottom, so after I attached it, I trimmed the little bit that was hanging past the bottom off. I then added some red tissue paper to the inside of the bag.
Dimensions (CS = Cardstock):
- Cherry Cobbler CS: 8-1/2" x 5-1/2" (card base)
- 3-1/2" x 3-1/2" (circle - #7 circle die)
- Early Espresso CS: 4" x 5-1/4" (embossed base layer)
- Old Olive CS: 1-3/4" x 1-3/4" (leaf/berry branches)
- Basic Beige CS: 3-1/4" x 3-1/4" (circle - #6 circle die)
- 8-1/2" x 3-1/2" (lamp, bow, pinecones, pine branches, & sentiment)
- 4" x 5-1/4" (inside layer)
- Festive Glimmer Paper: Scrap piece (die-cut berries - need 6-8)
- Sentimental Christmas DSP: 4" x 2-1/2"
- Cherry Cobbler & Gold Satin Ribbon: (2) 6" (strip & bow)
Dimensions:
- Gift Bags Combo Pack: One small gift bag
- Cherry Cobbler CS: 3-1/2" x 3-1/2" (circle - #7 circle die)
- Basic Beige CS: 3-1/4" x 3-1/4" (circle - #6 die)
- 7" x 3-1/2" (lamp, bow, pinecones, & pine branches)
- Sentimental Christmas DSP: 3-3/8" x 3-3/4"
Don't Miss Everyone Else's Great Projects...
Join the Blog Hop!
To join the hop, and see the other fabulous creations, click on the names below. If you're reading this in an email - you'll need to click HERE to go to my blog and scroll down until you see the blog hop list.
************************


I love your beautiful card and matching gift bag! That lantern was one of my instant favs in the mini catalog!
ReplyDeleteThank you so much, Tina! I'm glad you like it. It was one of my favs, too. I'm so glad I could finally make something with it.
DeleteLove the glow! Thanks so much sharing the how-to! Beautiful way to showcase the warmth of the holiday season!
ReplyDeleteThanks, Melissa! I'm glad you like my how-to, too. This is such a beautiful bundle!
DeleteLove your beautiful projects. Very elegant.
ReplyDeleteThank you so much, Renee! I'm really glad you love them.
Delete