


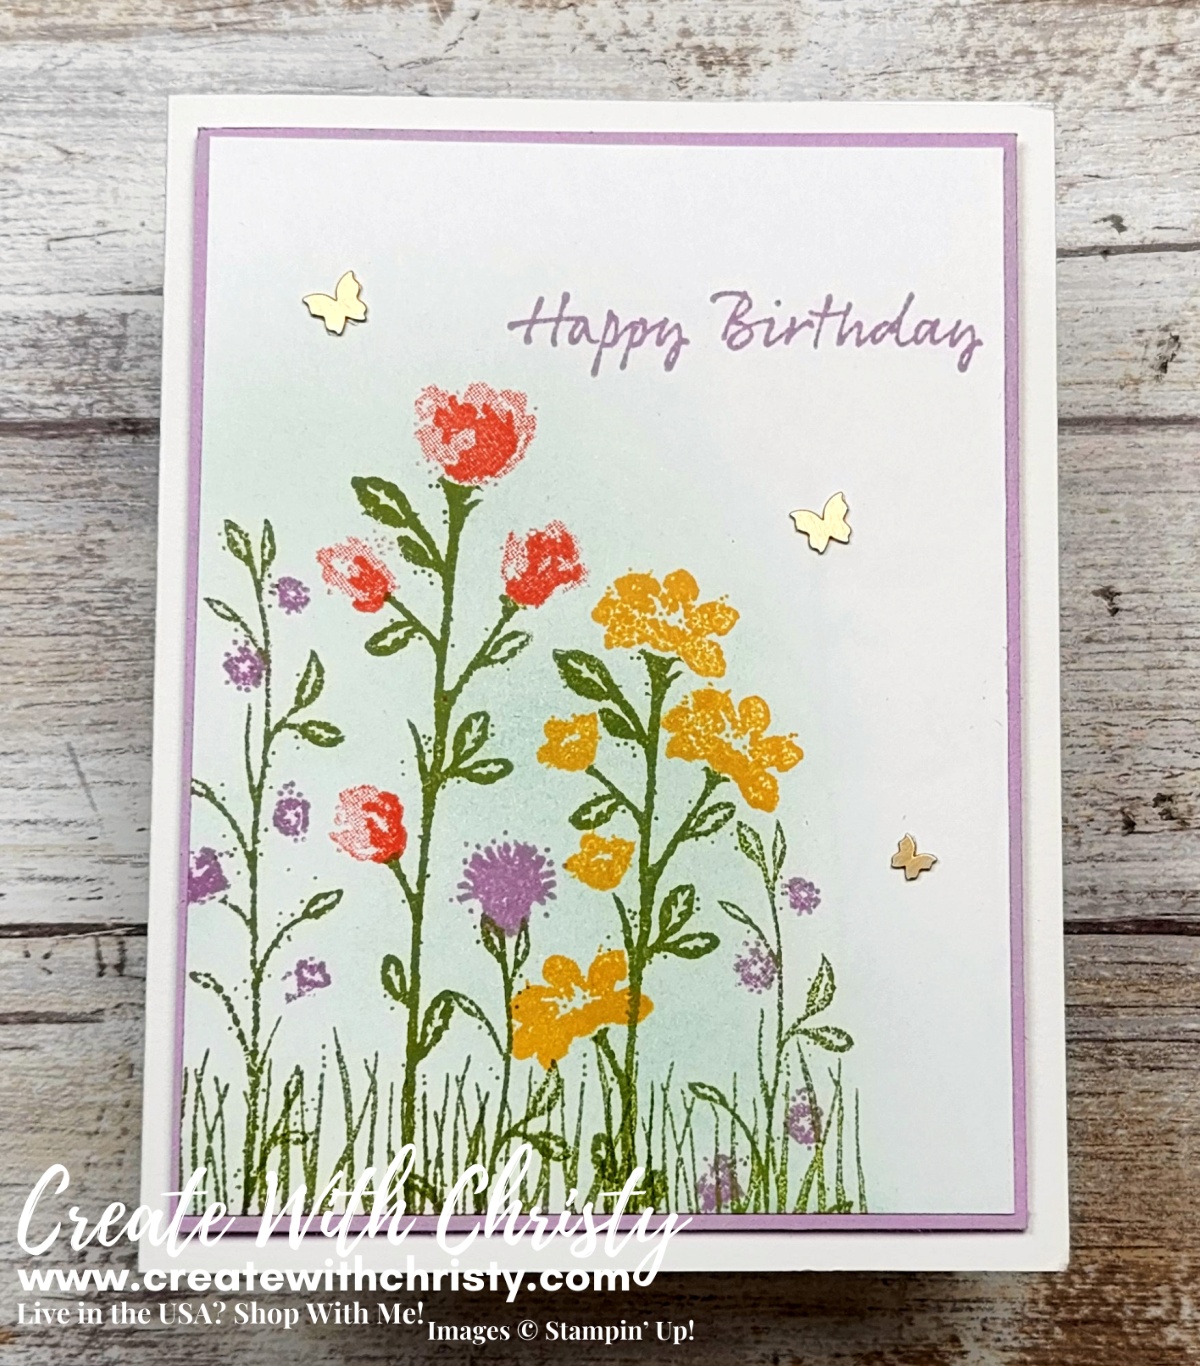
Welcome to the One Stamp At a Time Blog Hop! I'm go glad to have you here at Create With Christy! This month, our theme is The Great Outdoors. I decided to make my great outdoors projects with the Wildflower Path Stamp Set. It debuted in the January-June 2022 Mini Catalog, but thankfully, it made it into the 2022-2023 Annual Catalog.

The wildflower stamps in the Wildflower Path Stamp Set are so pretty. There are so many ways to use them, too. There are two different stems, but so many flowers to put on them. I love the little "splatter" they added around the images, too.

The card is super simple. Just 3 layers, some stamping, three butterfly embellishments, and you're done. The stamps are what make this card look special. The butterfly embellishments do, too. They're the Brushed Brass Butterflies. Like the stamp set, they debuted in the Jan-June Mini, and they made it into the new annual catalog, too.

I stamped the pouch the same way as the card...on both the front and the back. I didn't brush Pool Party ink on it like the card, though. I was afraid it would show the score lines I didn't use for my pouch. You can easily put treats inside the pouch, too. I tied 3 Ghirardelli square candy bars together with twine, put them inside, and then tied the pouch closed on top.
Learn How to Make My Card and Pouch in My Written Tutorial Below
Card Dimensions (CS = Cardstock):
- Thick Basic White CS: 8-1/2" x 5-1/2" (card base)
- Fresh Freesia CS: 3-7/8" x 5-1/8" (base layer)
- Basic White CS: 3-3/4" x 5" (main image)
- Brushed Brass Butterflies: 2 large & 1 small

Candy Pouch Dimensions:
- Basic White CS: 9" x 6" (two pillowbox pieces)
- Fresh Freesia Open Weave Ribbon: 15"
- Masking Paper: 4-1/4" x 2-1/4"
You Can Find the Complete Supply List for Both Projects Below
Don't Miss Everyone Else's Great Projects...
Join the Blog Hop!
To join the hop, and see the other fabulous creations, click on the names below (if you're reading this in an email - you'll need to click HERE to go to my blog and scroll down until you see the blog hop list):


************************


If You're Reading This Post After June 30, 2022, Click on the Picture to See the
Current Month's Thank You Gifts and Host Code


