


I hope you're all having a wonderful day! I finally have a card to share with you. I used this month's Creating Pretty Cards Card Sketch #63 (CPC63) at Craft Project Central. I didn't design a project this month, but I just had to make a card using Monika Davis' great card sketch. If you make a card using the sketch and submit it, you could win a FREE Month Subscription to Craft Project Central! CLICK HERE to find out how.

As you can see, this card has a window that opens into the inside of the card. The picture below shows the inside of the card. I used the tree die in the Halloween Scenes Edgelits Dies.

Card Instructions:
- Fold an 8-1/2" x 5-1/2" piece of Basic Black Cardstock in half to form the card base.
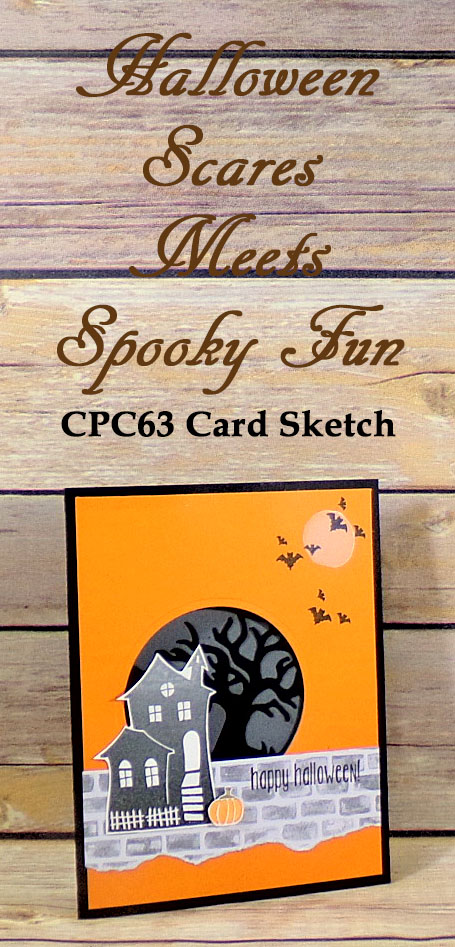
- Die-cut a circle out of the center, left of a 4" x 5-1/4" piece of Pumpkin Pie Cardstock using the 3rd largest circle die from the Layering Circles Framelits Dies.
- Stamp the moon stamp from the Halloween Scares Stamp Set onto the top, right corner of the Pumpkin Pie piece using the Whisper White Craft Stampin' Pad. Dry the ink with the Heat Tool. Stamp the little bat trio stamp three times using the darkest part of the Black Ombre Stampin' Pad.Attach the piece to the center of the card base.
- Line up the blade in the circle die used in Step 2 within the edges of the hole in the Pumpkin Pie layer. Run it through the Big Shot to make the window in the card base.
- Attach a 4" x 5-1/4" piece of Basic Gray Cardstock to the inside of the card. Close the card. Trace around the inside edges of the window onto the Basic Gray layer inside of the card using a pencil.
- Die-cut the tree die from the Halloween Scenes Edgelits Dies out of a 2-3/4" x 2-3/4" piece of Basic Black Cardstock. Attach the tree to the inside of the card using the Fine-Tip Glue Pen. Make sure to have the tree attached to the inside, right of the drawn circle. The right tree branches will be outside of the circle a little bit. Erase the pencil mark off.
- Cut one 4" x 2" piece of gray brick paper from the Halloween Night Specialty Designer Series Paper (DSP). Stamp the "happy halloween" stamp from the Spooky Fun Stamp Set onto the top, right corner of the piece using the darkest part of the Black Ombre Stampin' Pad. Tear about a 1/2" off the bottom edge of the DSP piece, and attach it across the bottom of the Pumpkin Pie layer, covering up the bottom part of the window.
- Stamp the house stamp from the Halloween Scares Stamp Set onto a 2" x 3'" piece of Whisper White Cardstock using the Black Ombre Stampin' Pad. When inking up the stamp, move the stamp up and down a little bit be get a more gradual change in the colors, and prevent there being any white lines in the image. Stamp the pumpkin stamp onto the piece by inking the stamp with the Pumpkin Pie marker from the Brights Collection Stampin' Markers and the Soft Suede marker from the Neutrals Collection Stampin' Write Markers. Cut the house and the pumpkin out freehand using Paper Snips.
- Attach the house to the left side of the window, and attach the pumpkin to the bottom, right corner of the house using a Stampin' Dimensional.


